What You Need to Know Before Renovating Your Shower
What You Need to Know Before Renovating Your Shower
Shower stalls – the place for a quick refresh – have evolved rapidly. Their equipment can now resemble luxury spa features. Imagine having a steam shower in your own bathroom with colored lights and built-in speakers.
It’s no surprise that water used for showering accounts for up to 17% of a typical household’s water bill. This high usage led to the development of a new generation of showerheads designed to make the most of smaller amounts of water.
Thermostatic valves have eliminated temperature shocks, exposed risers have become a design element, and frameless glass panels let natural light into the shower.
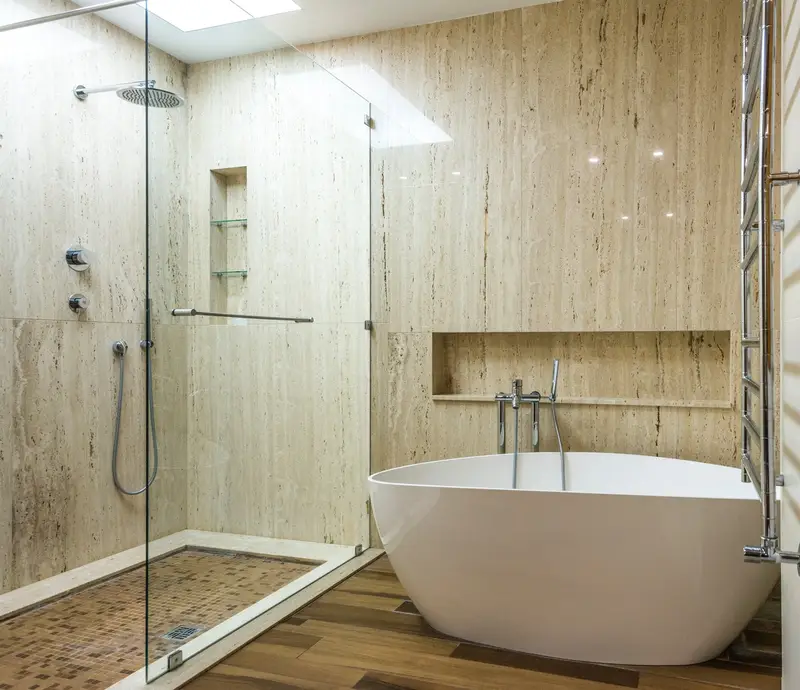
Add built-in niches for shampoo and shower gel, a handheld shower, and a built-in bench, and you suddenly have a space where you’ll want to spend plenty of time. If you want something more luxurious, consider wall-mounted body sprays, a steam shower, and radiant floor heating. Before beginning your renovation, consult a plumber, as proper pipe placement and connections are crucial for the system’s overall functionality.
Let’s look at what you need to know and consider before renovating your shower.
How Large Should Your Shower Be?
One cost-effective and space-efficient solution is to use the niche where the bathtub once was – typically about 1 × 1.5 meters (roughly 3 × 5 feet). Even a space of one square meter (≈10.7 sq ft) can be ideal. A shower does not need to be wider than one meter (≈3 ft).
If you want a shower large enough for two people to comfortably use at the same time, you’ll need at least 1.5 meters (≈5 ft) in length to accommodate showerheads at either end.
If possible, place the control panel on the side closer to the shower exit, so you can turn on the water without getting wet. It also looks far more aesthetically pleasing. Wherever you place it, ensure the controls are easily accessible even when you’re not standing in the shower.
Where Should the Drain Be?
If you’re renovating your shower without changing its size or shape, you’ll save money by leaving the drain in place. For standard-sized layouts, a prefabricated shower pan sloped toward the drain can also save time and money. These pans are made from solid polyurethane and attach directly to tile, providing a clean look.
If you plan to move the drain, be prepared to spend a few hundred dollars on demolition work.
Plan everything ahead. Review your plumbing layout with your contractor and ensure the shower valve and head are at a comfortable height.
Install convenient grab bars – useful even if you’re just washing your feet. If space allows, add a bench as well.
If you’re including a steam shower, ensure there’s enough space for steam heads, wiring, and a generator outside the shower. For radiant floor heating and the latest smart controls, additional space may be needed to accommodate all wiring.
Two Ways to Increase Your Shower’s Water Resistance
- Mortar Bed + Waterproofing
A custom copper channel filled with a thick mortar bed provides a stable base for tile. First, the mortar bed should be covered with two layers of a two-component liquid waterproof membrane, and walls should be primed twice. This process takes about three days, but done correctly, you won’t have to worry about water seeping beneath the tiles. - Foam Components
A simpler option exists as well. Specialty stores offer foam components covered with a very thin, waterproof-compatible membrane. This makes the process straightforward, and a 1 × 1-meter (≈3 × 3 ft) shower can be ready in 6 hours. Tile installation can begin immediately afterward.
Drains
It’s easier to tile at a right angle around a square drain than to cut tiles to fit a round drain. Linear trench-style drains require a slight slope in the shower floor in one direction and are typically installed along the back wall. Careful tile planning is crucial for proper water drainage and a flawless, aesthetically pleasing finish.
Things to Keep in Mind
To have the shower floor flush with the rest of the bathroom, the frame beneath the shower pan must be lowered, or the floor outside the shower raised. Don’t forget that the shower head and all other nozzles should be directed away from the door.
Shower Fixtures
While shower heads can be high-quality and need not be extremely expensive, plan to invest in high-quality valves, controls, and surface finishes.
- Weight Matters
Valve bodies made of cast bronze or brass last longer and generally cause fewer problems. The same goes for other fixtures. Painted plastic is lightweight and less durable than solid brass with a galvanic surface. Ceramic disc valves are another good choice, as they resist debris and impurities in the pipes. - Choose Your Showerhead Carefully
Look for shower heads with easily cleanable silicone nozzles, offering wide coverage and user-friendly controls. Top shower heads use flow control with pressure compensation – air injection, window-squeegee-like motion, cross or spiral spray patterns – creating the sensation of a heavy rainfall.
Adjustable water flow, from a light mist to a powerful stream, is an added benefit. Rain showers are designed to hit the head first but don’t allow excessive water flow.
- Thermostatic Valves Offer Greater Control
A thermostatic valve is a bigger investment but provides safety and comfort that a standard pressure valve cannot. It has two controls – one for water volume, one for temperature – and automatically adjusts the water temperature to your preferences.
Photo: Max Vakhtbovych – Pexels
Related articles

7 Things You Need to Know Before Renovating Your Flat or House
You know you want to renovate your flat or house, but you are not quite sure where to start. You are not alone. Many homeowners jump into a renovation project without fully understanding what lies ahead.

Restoring Original Parquet Floors: Why Refurbishing Old Flooring Is Worth It
Old wooden floors carry a unique character that is difficult to replicate in modern new builds. Restoring original parquet blocks is not only an environmentally responsible decision, but also an investment in the timeless beauty of your interior. A professionally refurbished wooden floor can often outperform brand new materials in both appearance and longevity.

Floor levelling: what it is and why you should never skip it
An uneven floor can be a hidden issue that gradually turns into a visible and expensive mistake. Properly levelling the surface before installing a floor covering is essential for both durability and appearance. Many people underestimate this step or skip it entirely, only to face problems later such as bubbles, warping or cracks. This is why floor levelling is a crucial stage in every renovation and new build. In this article, you will learn why a high-quality levelling base is so important and how it should be carried out correctly.